.png)
How to Make a DIY Reusable Vacuum Bag; 8 Easy Steps to Follow
- Written By: Saman Shoaib
- Last Updated: November 24, 2023

SECTIONS
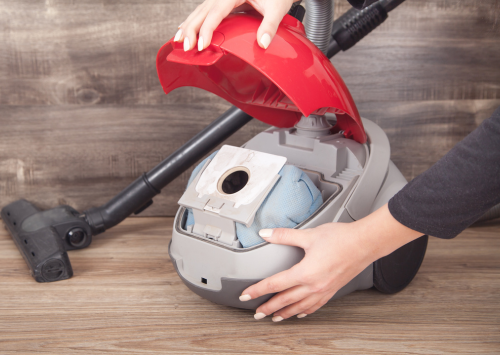
ToggleHave you made any DIY reusable vacuum bag for your vacuum cleaner? May be not! You can estimate its significance while cleaning your carpeted floor with a vacuum cleaner. But continuous use makes the internal bag more messy that needs to change time and again. So why not a permanent solution?
Vacuum cleaners have become an essential tool for keeping our homes clean and free of dust and debris. However, the cost of disposable vacuum bags can add up over time and contribute to unnecessary waste in landfills.
To combat this issue, many people are turning to reusable vacuum bags as an eco-friendly and cost-effective alternative.
In this comprehensive guide, we will walk you through the process of making your very own DIY reusable vacuum bag.
Why Choose a Reusable Vacuum Bag?
Before we delve into the steps of making a DIY reusable vacuum bag, let’s explore why you might want to choose one over disposable bags:
👉 Eco-Friendly
Disposable vacuum bags are a significant source of waste. By opting for a reusable bag, you can reduce your environmental footprint and contribute to a cleaner planet. According to the U.S. Environmental Protection Agency (EPA), approximately 2.6 million tons of vacuum cleaner bags and accessories end up in landfills each year. Making the switch to a reusable bag can help mitigate this waste.
👉 Cost-Effective
While reusable vacuum bags may have a slightly higher initial cost, they can save you money in the long run as you won’t need to purchase disposable bags regularly. Over time, this cost savings can be substantial, making reusable bags a smart financial choice.
👉 Customization
When you make your own reusable vacuum bag, you have the flexibility to choose the fabric, design, and size that best suits your needs. This customization allows you to create a bag that perfectly fits your vacuum cleaner and complements your home decor.
👉 Washable
Reusable bags can be easily cleaned and reused, making them a hygienic option for maintaining a clean home. Unlike disposable bags, which are often discarded after one use, reusable bags can be emptied and washed, ready to tackle the next cleaning session.
Now that you understand the benefits of using a reusable vacuum bag, let’s get started on making one.
Materials You’ll Need
Before you begin, gather the following materials.
If you already have then it’s great BUT if you do not have any of these given products, click on the products names
1️⃣ Fabric
Choose a durable, tightly woven fabric like cotton or canvas. Make sure it’s compatible with your vacuum cleaner. You’ll need enough fabric to create two bag panels. Consider selecting a fabric pattern or color that matches your personal style.
2️⃣ Thread
High quality thread that matches the color of your fabric is essential for sturdy seams that can withstand repeated use.
3️⃣ Scissors
Sharp scissors are necessary for cutting fabric cleanly and accurately. So, take scissors for easy cutting the cloth for making a vacuum bag.
4️⃣ Measuring Tape or Ruler
In order to measure and cut your fabric pieces precisely, you’ll need a measuring tape or ruler and ensure accuracy and perfection in measurement.
5️⃣ Pins
Straight pins are handy for holding fabric pieces together while sewing, ensuring that your seams stay aligned.
6️⃣ Sewing Machine
While you can sew a reusable vacuum bag by hand, a sewing machine will make the process faster and more precise. If you have access to one, consider using it for this project.
7️⃣ Velcro or Zipper
To create a sealable opening for emptying the bag, you’ll need either Velcro or a zipper. Choose the option that you find most convenient.
8️⃣ Elastic Band (optional)
If your vacuum cleaner requires an elastic band to secure the bag in place, make sure you have one that fits properly.
Step-by-Step Guide to Making a Reusable Vacuum Bag

Follow these detailed steps to create your DIY reusable vacuum bag:
1
Measure and Cut Your Fabric
Start by measuring and cutting two pieces of fabric to the desired size for your vacuum bag. It’s crucial to measure accurately to ensure a snug fit in your vacuum cleaner. If your vacuum cleaner uses a specific bag size, consult the manufacturer’s guidelines for measurements.
To measure the fabric, place your measuring tape or ruler against the fabric, and mark the dimensions you need. Use sharp scissors to cut along the marked lines.
2
Pin the Fabric Pieces Together
Place the two fabric pieces with their right sides facing each other. This will create the inner part of your bag. Align the edges carefully, ensuring that they match up evenly. Use straight pins to secure the sides and bottom edges together, leaving the top open. This pinned assembly will form the basic bag shape.
Pinning is a crucial step to prevent the fabric from shifting during sewing, resulting in neat and precise seams.
3
Sew the Sides and Bottom
Using a sewing machine or hand sewing, sew along the pinned sides and bottom of the bag, leaving an ¼ inch seam allowance. A seam allowance is the space between the seam and the raw edge of the fabric. Reinforce the stitching by going over it a second time for added strength. Make sure to backstitch at the beginning and end of each seam to secure the seams in place.
If you are sewing by hand, use small, even stitches to maintain the bag’s integrity. Double stitching can also be done manually for added durability.
4
Create an Opening
Next, you need to create an opening at the top of the bag for emptying the contents. You can choose between two closure options: Velcro or a zipper.

Velcro Closure
- Cut a strip of Velcro to the desired length. The length should match the width of the bag’s opening.
- Sew one side of the Velcro strip to the inside of the bag’s top edge, ensuring it is positioned close to the edge.
- Sew the other side of the Velcro strip to the outside of the bag’s top edge, making sure they align when the bag is closed. This creates a secure and easy-to-open closure.
Zipper Closure
- Measure the length of the bag’s top edge where you want to attach the zipper.
- Cut a zipper slightly shorter than the measured length.
- Sew the zipper to the inside of the bag’s top edge. Ensure that the zipper teeth face outward.
- When sewing the zipper, you may need to use a zipper foot attachment on your sewing machine for precision.
The choice between Velcro and a zipper depends on your preference and sewing skills. Velcro provides a simple, no-fuss closure, while a zipper offers a more secure seal.
5
Reinforce the Opening (Optional)
To ensure that the opening stays securely closed during vacuuming, you can add an extra layer of fabric or bias tape around the edges of the opening. This reinforcement not only enhances the bag’s durability but also provides a finished look.
Cut a strip of fabric or bias tape that matches the width of the bag’s opening. Fold it in half lengthwise with the right sides facing out and align it with the edges of the opening. Sew it in place, enclosing the raw edges of the bag’s fabric and the closure mechanism. This creates a clean and reinforced opening that can withstand the rigors of vacuuming.
6
Attach an Elastic Band (If Needed)
Some vacuum cleaners require an elastic band to hold the bag securely in place. If your vacuum cleaner falls into this category, you’ll need to attach an elastic band to your bag.
Position the elastic band near the top of the bag’s open end, where it will be secured to the vacuum cleaner’s inlet. The band should be long enough to stretch around the inlet and hold the bag in place. Sew the elastic band securely to the bag, making sure it is taut but not too tight. This ensures that the bag can be easily removed and reattached when needed.
7
Turn the Bag Right Side Out
Carefully turn the bag right side out, so the seams are hidden on the inside. Your DIY reusable vacuum bag is now complete!
8
Test Your New Bag
Before using your homemade vacuum bag, it’s essential to ensure that it fits securely in your vacuum cleaner and that the closure mechanism works effectively. Place the bag in the vacuum cleaner’s inlet, ensuring that it covers the opening entirely and the closure is functioning correctly. Run a brief test to see how the bag handles suction and collects debris.
Maintenance and Cleaning

To ensure the longevity and cleanliness of your reusable vacuum bag, follow these maintenance and cleaning tips:
Regular Cleaning
Empty the bag after each use to prevent dust and debris buildup. Shake it out or use a small brush to remove any remaining particles. By keeping the bag clean after each vacuuming session, you’ll maintain optimal suction and airflow.
Washing
Periodically, depending on usage, remove the bag and wash it according to the fabric’s care instructions. Use mild detergent and cold or lukewarm water. Avoid using bleach or harsh chemicals that may damage the fabric. After washing, allow the bag to air dry completely before reinserting it into the vacuum cleaner.
Inspect Seams
Regularly check the bag’s seams for any signs of wear or damage. Inspect the stitches to ensure they remain secure and free from fraying. If you notice any issues, repair or reinforce the seams as needed to maintain the bag’s integrity.
Replace as Necessary
Over time, even reusable bags may wear out due to repeated use and washing. Be prepared to replace your DIY bag when it shows signs of excessive wear and tear. Creating a spare bag during your initial sewing project can be a wise strategy, ensuring you always have a backup on hand.
Final Thoughts
Making your own DIY reusable vacuum bag is a rewarding and environmentally friendly project that can save you money in the long run. By following the detailed steps outlined in this guide, you can create a custom-fit, durable vacuum bag that will keep your home clean while reducing waste. Enjoy the satisfaction of contributing to a greener planet one vacuum at a time! Reusable vacuum bags not only benefit your wallet but also make a positive impact on the environment, demonstrating that small changes in our daily lives can add up to significant improvements in sustainability and waste reduction.